
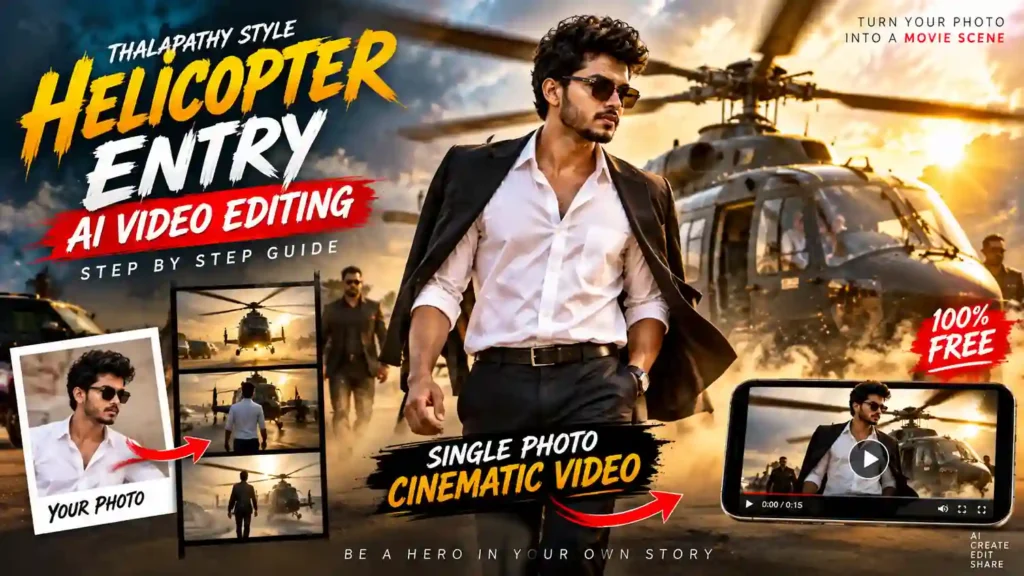
Aajkal Instagram par AI-generated videos ka trend kaafi tezi se viral ho raha hai. Aapne bhi shayad aise Instagram Reels dekhe honge, jisme ek person helicopter se dramatic entry karta hua dikhai deta hai. Video ka cinematic look, helicopter landing, slow-motion shots aur powerful hero-style presentation ise aur bhi attractive banate hain.
Is trend mein log apni normal photo ka use karke movie-style helicopter entry videos bana rahe hain. Sabse interesting baat ye hai ki iske liye aapko professional camera, expensive editing software ya filmmaking ka experience zaroori nahi hai.
Download Refrence Video
Click below to download your file securely.
AI tools ki madad se aap sirf ek photo ko use karke apna cinematic hero-entry video create kar sakte hain. Is article mein main aapko Viral Helicopter AI Video Editing ka complete process step by step samjhaunga. Saath hi, aapko character sheet image banane ka prompt aur AI video generation ke liye useful prompts bhi milenge.
Agar aap bhi apni photo se Instagram par trending helicopter entry Reel banana chahte hain, toh is article ko poora padhiye.
AI VIDEO PROMPT
REFERENCE VIDEO • CINEMATIC ACTION
Details Of Viral Helicopter AI Video Editing
Sabse pehle samajhte hain ki ye helicopter AI video trend itna popular kyun ho raha hai.
Indian movies mein hero entry scenes kaafi popular hain. Jab hero helicopter se kisi location par arrive karta hai, background mein dramatic music bajta hai aur camera slow-motion mein hero ko capture karta hai, toh poora scene cinematic feel deta hai.
Ab AI technology ki madad se creators isi tarah ke scenes ko apni photos ke saath recreate kar rahe hain.
Thalapathy Vijay ke movie-style action scenes se inspired helicopter entry videos bhi isi concept par based hain. Log apni photo upload karke AI se cinematic environment, stylish outfit aur helicopter landing scene generate karte hain.
Iske baad generated image ko AI video tool ki madad se animate kiya jata hai. Result mein ek short video milta hai, jise Instagram Reel, YouTube Shorts ya Facebook par upload kiya ja sakta hai.
Lekin ek baat samajhna zaroori hai: AI-generated video ek digitally created scene hota hai, actual movie footage nahi. Aap isse apne creative content ke liye use kar sakte hain, lekin ise real footage ke roop mein present nahi karna chahiye.
Chaliye ab poora editing process samajhte hain.
What Do You Need To Create This AI Video?
Helicopter entry AI video banane ke liye aapko bahut zyada equipment ki zaroorat nahi padegi.
Aapke paas ye basic cheezein honi chahiye:
- Apni ek clear photo.
- AI image-generation tool.
- Character sheet banane ke liye prompt.
- AI image-to-video tool.
- CapCut ya koi doosra video editor.
- Background music aur cinematic sound effects.
Aap apne smartphone se bhi is process ko start kar sakte hain.
Sabse important cheez aapki original photo hai. Agar photo clear hogi aur face achhe se visible hoga, toh AI ko aapki appearance ko reference ke roop mein use karne mein madad mil sakti hai.
Aapko DSLR camera se click ki hui photo ki zaroorat nahi hai. Ek achhi lighting wali smartphone photo bhi starting point ke roop mein kaam kar sakti hai.
Step 1: Apni Best Photo Select Karein
Sabse pehle apne phone ki gallery open karein aur ek suitable photo select karein.
Koshish karein ki aapki photo mein face clearly visible ho. Bahut zyada blur, heavy filter ya covered face wali photo avoid karein.
Agar aapke paas high-resolution photo hai, toh use select kar sakte hain. Isse AI tool ko facial details samajhne mein madad mil sakti hai, halanki perfect result ki guarantee nahi hoti.
Aap front-facing portrait ya full-body photo ka use kar sakte hain. Ye aapke desired video style par depend karega.
For example, aap ye scenes create kar sakte hain:
- Helicopter landing hero entry.
- Desert action scene.
- Stylish cinematic arrival.
- Village hero entry.
- Movie-style slow-motion shot.
Is tutorial mein hum helicopter landing ke saath ek dramatic cinematic hero-entry scene create karenge.
Step 2: Character Sheet Image Create Karein
Ye poore process ka ek important step hai.
Bahut se beginners directly apni photo upload karke AI se video banane ki koshish karte hain. Kabhi-kabhi result achha aata hai, lekin kuch videos mein face, hairstyle, outfit ya body structure change ho jata hai.
Isi problem ko kam karne ke liye aap Character Sheet Image create kar sakte hain.
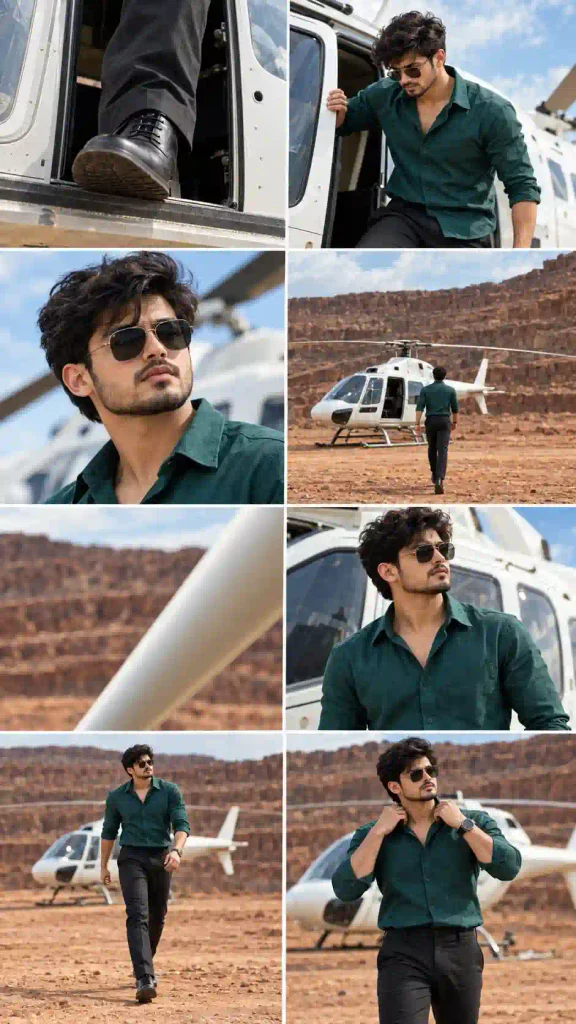
Character sheet ek aisi reference image hoti hai, jisme ek hi character ko alag-alag angles se dikhaya jata hai.
Ismein aap include kar sakte hain:
- Front view.
- Left side profile.
- Right side profile.
- Three-quarter view.
- Back view.
- Full-body view.
Iska main purpose character ki appearance ko establish karna hota hai. Ye AI ko reference deta hai, lekin har frame mein exact consistency ki guarantee nahi deta.
Character Sheet AI Prompt
Neeche diya gaya prompt aap apni photo ke saath AI image-generation tool mein try kar sakte hain.
Prompt:
Create a highly detailed cinematic character reference sheet using the uploaded photograph as the primary identity reference. Preserve the person’s recognizable facial features, hairstyle, skin tone, and overall appearance as accurately as possible. Show the same character from multiple angles, including front view, left profile, right profile, three-quarter view, back view, and full-body view. The character is dressed in a stylish, realistic movie-inspired action outfit suitable for a dramatic helicopter landing scene. Maintain consistent facial identity, body proportions, hairstyle, and clothing details across all views. Use professional cinematic lighting, realistic textures, natural anatomy, and high-resolution visual quality. Arrange the views neatly in a single reference sheet with a clean neutral background. Avoid duplicate limbs, distorted facial features, extra fingers, inconsistent clothing, and unnatural body proportions. Photorealistic, detailed, professional character design reference, cinematic action-film aesthetic.
Prompt paste karne ke baad apni photo upload karein aur image generate karein.
Agar pehli image mein face ya outfit sahi nahi aa raha hai, toh aap prompt ko refine karke dobara try kar sakte hain.
Pro Tip: Ek hi photo se perfect character sheet har baar generate nahi hoti. Isliye result ko check karna aur zaroorat padne par multiple versions banana normal hai.
Step 3: Helicopter Landing Scene Generate Karein
Ab jab aapki character sheet ready ho gayi hai, toh next step mein aapko main helicopter landing scene create karna hai.
Is step mein aap decide karenge ki aapka character kahan khada hoga, helicopter kis position mein hoga aur scene ka overall cinematic look kaisa rahega.
Imagine kijiye ki aap ek open location par khade hain. Aapke peeche helicopter land kar raha hai, rotor blades ghoom rahe hain aur hawa ki wajah se dust particles ud rahe hain.
Aap camera ki taraf confidence ke saath dekh rahe hain, jisse poora scene movie-style hero entry jaisa feel deta hai.
Helicopter Hero Entry AI Image Prompt
Create a photorealistic cinematic action-movie scene using the uploaded character reference sheet as the identity and appearance guide. Show the same person standing confidently in the foreground as a helicopter lands behind them. The helicopter blades are rotating, creating realistic dust and atmospheric movement. The character has a powerful, stylish hero-entry presence, wearing a realistic movie-inspired outfit with natural fabric details. Use a wide-angle cinematic composition, dramatic sunlight, subtle atmospheric haze, realistic shadows, and detailed environmental textures. The camera captures the character from a slightly low angle to create a strong cinematic perspective. The helicopter should appear naturally integrated into the environment, with believable proportions and lighting. High-end action-film visual style, realistic skin texture, sharp subject focus, cinematic color grading, natural anatomy, professional filmmaking composition, 4K-quality detail. Avoid distorted faces, extra limbs, incorrect helicopter structures, artificial-looking textures, and cartoon-like rendering.
Is prompt ko apni character reference image ke saath use karke helicopter scene generate karein.
Aap apni preference ke according location bhi change kar sakte hain.
For example:
- Desert location.
- Open ground.
- Village road.
- Airport-style environment.
- Mountain area.
Lekin starting mein scene ko zyada complicated mat banaiye. Pehle ek simple aur realistic helicopter landing scene generate karein.
Step 4: AI Image Ko Video Mein Convert Karein
Ab aapke paas helicopter landing ki image ready hai.
Next step mein aapko is image ko video mein convert karna hai. Iske liye aapko ek AI video-generation tool chahiye jo Image-to-Video feature support karta ho.
Aise tools mein aap ek image upload karke usmein movement add karne ke instructions de sakte hain. Free credits aur available features alag-alag tools mein different ho sakte hain.
Apni generated helicopter image upload karein aur image-to-video option select karein.
AI Video Animation Prompt
Animate this cinematic helicopter landing scene realistically. The helicopter blades rotate naturally while strong wind from the rotor creates subtle movement in the character’s clothing and surrounding dust. The character remains consistent with the uploaded reference, standing confidently with a controlled, powerful hero-entry posture. Add a slow cinematic camera movement, gradually moving closer to the character while keeping the face and body proportions stable. Maintain realistic lighting, natural shadows, believable environmental motion, and detailed cinematic atmosphere. The character should move subtly and naturally without exaggerated gestures. Preserve facial identity, clothing design, and scene composition throughout the video. Create a polished action-film style shot with smooth motion and realistic physics.
Prompt add karne ke baad video generate karein.
AI tool aapki image ko animate karke helicopter blades, dust, camera movement aur character ke subtle movements create karne ki koshish karega.
Different Camera Movements Try Karein
Aap apne video ko aur cinematic banane ke liye alag-alag camera movements try kar sakte hain.
1. Slow Push-In
Camera dheere-dheere character ke paas aata hai. Isse hero-entry ka dramatic effect create ho sakta hai.
2. Low-Angle Camera
Camera neeche se character ko capture karta hai, jisse scene mein powerful cinematic perspective aa sakta hai.
3. Side Camera Movement
Camera horizontally move karta hai, jabki character frame mein visible rehta hai.
Shuruaat mein simple camera movement use karein. Bahut saare complicated instructions ek saath dene se AI video mein distortions aa sakte hain.
Step 5: AI Video Download Karke Editing Karein
Video generate hone ke baad use poora preview karein.
Kuch important cheezein check karein:
- Kya face consistent hai?
- Kya helicopter realistic dikh raha hai?
- Kya character ka movement natural hai?
- Kya video mein unwanted distortions hain?
- Kya camera movement smooth hai?
Agar result achha nahi hai, toh aap simpler prompt ke saath video dobara generate kar sakte hain.
Jab aapko suitable video mil jaye, toh use apne preferred video editor mein import karein.
Aap CapCut jaise video editor ka use kar sakte hain. Desktop ya mobile par available doosre editing tools bhi kaam aa sakte hain.
Step 6: CapCut Mein Cinematic Editing Karein
Ab apna AI-generated video CapCut mein open karein.
Yahan aap video ko Instagram Reel ke liye prepare kar sakte hain.
1. Video Ratio 9:16 Rakhein
Instagram Reels ke liye vertical 9:16 format commonly used hota hai.
CapCut mein project ka aspect ratio 9:16 set karein, taaki video mobile screen par properly display ho.
2. Unwanted Clips Remove Karein
Agar video ke starting ya ending mein distorted frames hain, toh unhe trim kar sakte hain.
Sirf strong aur visually attractive portion ko rakhein.
3. Cinematic Music Add Karein
Aap apne video ke mood ke according background music choose kar sakte hain.
Agar aap kisi movie song ya trending audio ka use karna chahte hain, toh copyright aur Instagram ke applicable usage rules ko dhyan mein rakhein.
Music aisa choose karein jo helicopter landing aur hero-entry ke atmosphere ke saath match kare.
4. Helicopter Sound Effects Add Karein
Realistic helicopter rotor sound video ko aur immersive bana sakta hai.
Aap wind sound, landing sound aur subtle cinematic impact effects bhi add kar sakte hain.
Lekin bahut zyada sound effects use na karein. Over-editing se video artificial lag sakta hai.
5. Color Grading Karein
CapCut mein aap brightness, contrast, sharpness aur saturation adjust kar sakte hain.
Agar aap cinematic look chahte hain, toh subtle color adjustments try karein.
Bahut zyada sharpness ya saturation use karne se AI-generated footage unnatural dikh sakti hai.
Step 7: Video Mein Attractive Text Add Karein
Instagram Reel ke opening section mein ek short text overlay add kar sakte hain.
Isse viewers ko samajhne mein aasani hogi ki video kis trend par based hai.
Aap ye text use kar sakte hain:
- POV: Your Hero Entry 🔥
- When AI Turns You Into A Movie Hero
- The Helicopter Entry Trend
- Wait For The Landing!
Text ko short aur easy-to-read rakhein.
Agar aap AI-generated video upload kar rahe hain, toh caption mein AI-generated content ka mention karna transparency ke liye useful ho sakta hai.
Misleading claims, jaise video ko real movie footage batana, avoid karein.
Step 8: Final Video Export Karke Instagram Par Upload Karein
Editing complete hone ke baad video ko ek baar poora dekhein.
Upload karne se pehle in points ko check karein:
- Face clearly visible hai ya nahi.
- Helicopter scene properly generated hai ya nahi.
- Video smooth hai ya nahi.
- Background music ki volume sahi hai ya nahi.
- Video ka aspect ratio correct hai ya nahi.
- Koi unwanted watermark ya visual error toh nahi hai.
Sab kuch sahi hone ke baad video ko suitable quality mein export karein.
Ab Instagram open karein, new Reel create karein aur apna video upload kar dein.
Aap caption mein AI editing process ka short explanation de sakte hain aur audience se pooch sakte hain ki kya woh bhi aisa video create karna chahenge.
Dhyan rakhein ki AI video banane se viral views ki guarantee nahi hoti. Reel ki reach content quality, audience interest, timing aur Instagram distribution jaise factors par depend karti hai.
Common Mistakes Jo Aapko Avoid Karni Chahiye
Helicopter AI video banate waqt beginners kuch common mistakes karte hain. Inhe avoid karne se aapka workflow better ho sakta hai.
1. Low-Quality Photo Use Karna
Agar aapki original photo blurry hai ya face clearly visible nahi hai, toh AI ko appearance reproduce karne mein difficulty ho sakti hai.
Isliye clear reference photo se start karein.
2. Prompt Mein Bahut Saari Instructions Add Karna
Long prompt ka matlab hamesha better result nahi hota.
Agar aap ek hi prompt mein bahut saare actions, camera angles aur effects add kar denge, toh AI ko instructions follow karne mein difficulty ho sakti hai.
Pehle basic scene generate karein aur phir gradually improvements add karein.
3. Character Consistency Check Na Karna
Agar har frame mein face ya outfit change ho raha hai, toh reference image aur prompt ko improve karne ki koshish karein.
Video generate karne se pehle image ko carefully check karein.
4. Scene Ko Bahut Complicated Banana
Helicopter ke saath explosions, multiple characters, fast camera movement aur complex background add karne se errors ka chance badh sakta hai.
Pehle ek simple cinematic scene banaiye. Uske baad additional effects try karein.
Final Words
Toh friends, is tarah aap apni ek single photo ki madad se cinematic helicopter entry AI video create karne ka process explore kar sakte hain.
Iske liye aapko professional camera ya expensive filmmaking equipment ki zaroorat nahi hai. Ek clear photo, suitable AI prompts aur image-to-video tool se aap apne creative ideas ko short video mein convert kar sakte hain.
Is poore process mein Character Sheet Image banana ek useful step hai, kyunki ye aapke character ki appearance ke liye reference establish karta hai. Lekin AI-generated videos mein facial changes aur visual distortions ab bhi ho sakte hain, isliye final result ko check karna zaroori hai.
Agar aap pehli baar aisa video bana rahe hain, toh ek strong cinematic shot par focus karein. Ek hi video mein bahut saare effects add karne ke bajay pehle basic quality improve karein.
Aap different camera angles, outfits aur locations ke saath experiment kar sakte hain aur apna unique hero-entry style create kar sakte hain.
Aap bhi is AI helicopter entry trend ko try karein aur apni creativity ke saath ek cinematic Instagram Reel banayein! 🔥