
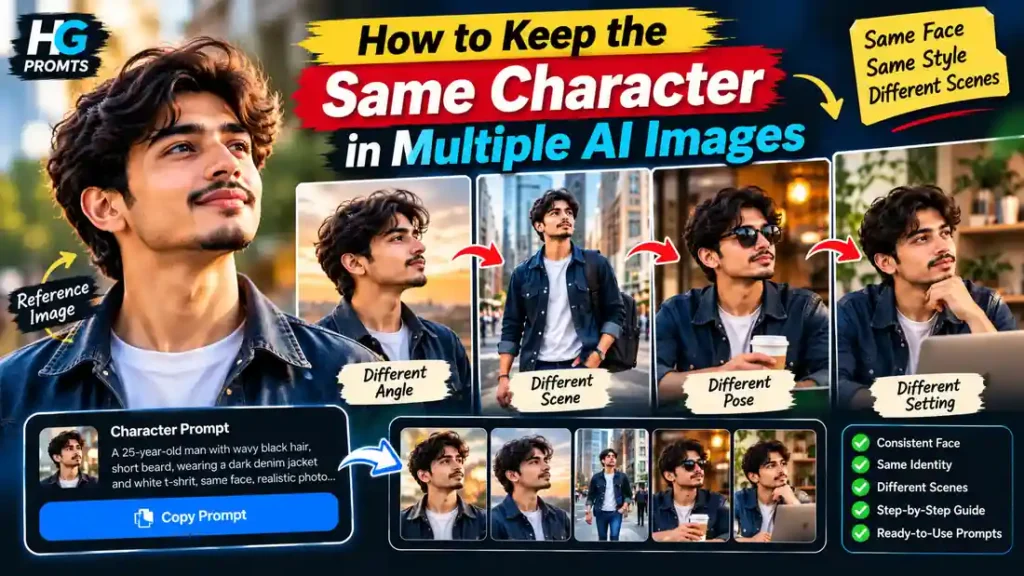
What Is AI Character Consistency?
AI character consistency means keeping a character’s recognizable appearance across multiple generated images, even when the setting, pose, clothing, lighting, or camera angle changes.
For example, you might want to create a series featuring the same young man in a city, a coffee shop, a university, and a mountain landscape. The backgrounds can change completely, but the character should still look like the same person.
A consistent character usually has these defining features:
- Facial identity: Face shape, eye spacing, nose, lips, and other distinctive features.
- Hair and facial hair: Hairstyle, hair color, beard, and mustache.
- Body proportions: Height, build, and overall silhouette.
- Distinctive details: Freckles, scars, glasses, accessories, or other identifying features.
- Visual style: Photorealistic, cinematic, anime, 3D animation, or illustration.
- Clothing: The same outfit when continuity matters, or a deliberate change when the story requires it.
Not every detail needs to remain identical in every image. The important thing is to decide which characteristics define your character and keep those characteristics stable.
Why Does AI Change a Character’s Face?
Most text-to-image workflows generate a new image from the instructions and references you provide. A text description alone may not communicate every subtle facial feature precisely enough to reproduce it in another scene.
Several factors can cause character drift.
1. Writing a Different Description Every Time
Suppose your first prompt describes a young man with an oval face, thick eyebrows, wavy black hair, and a short beard.
Your next prompt simply says, “A handsome young man walking through New York.”
The second description leaves many details open to interpretation. The generator may create a different person.
The fix: Keep a reusable character description and include it in every new generation.
2. Changing Too Many Things at Once
Changing the face, clothing, hairstyle, art style, camera angle, and lighting in one prompt makes it harder to identify which instruction caused the character to change.
The fix: Keep the character’s defining features fixed while changing one or two scene elements at a time.
3. Using Only Text Instead of a Reference Image
Text can describe a character, but a reference image provides a visual example of the appearance you want to preserve.
Modern image-generation tools offer different ways to use references. For example, OpenAI’s image prompting guidance recommends creating a reusable character reference, while Google’s Gemini image-generation documentation describes character-consistency capabilities in supported workflows. <sup>1 2</sup>
4. Mixing Different Visual Styles
A photorealistic portrait and an anime illustration may interpret the same character differently. Facial proportions, eye size, skin texture, and body shape can all change.
Choose your visual style early and keep it consistent unless the change is intentional.
Method 1: Create a Master Character Reference Image
This is the best starting point for most beginners.
Instead of generating every image from scratch, create one strong reference image that establishes the character’s appearance.
Step 1: Write a Detailed Character Description
Before generating the image, decide exactly what your character should look like.
For example:
- Age: Approximately 25 years old
- Face: Oval face with a defined jawline
- Eyes: Dark brown, medium-sized eyes
- Hair: Thick, slightly wavy black hair
- Facial hair: Short, neatly trimmed beard
- Skin tone: Medium brown
- Build: Average athletic build
- Signature outfit: Dark denim jacket over a plain white T-shirt
- Style: Photorealistic cinematic photography
These details become the foundation for every future image.
Avoid adding unnecessary descriptions that do not affect the character’s identity.
Step 2: Generate the First Portrait
Use the following prompt in an image generator that supports detailed text instructions.
Master Character Reference Prompt
Create an original, photorealistic male character portrait
for use as a consistent character reference across a series
of AI-generated images.

CHARACTER IDENTITY:

A 25-year-old man with medium-brown skin, an oval face,
a defined jawline, dark-brown eyes, thick slightly wavy
black hair, and a neatly trimmed short beard and mustache.

He has naturally proportioned facial features, a realistic
skin texture, subtle natural imperfections, and a calm,
confident expression.

His build is average and athletic.

SIGNATURE OUTFIT:

Dark-blue denim jacket over a plain white crew-neck T-shirt.
No logos, no text, and no unnecessary accessories.

PHOTOGRAPHY:

Photorealistic portrait photography, soft natural daylight,
realistic skin texture, sharp facial details, natural colors,
and a clean, unobtrusive background.

COMPOSITION:

Show the character from the chest up, facing the camera
with his head in a neutral position.

Keep the entire face clearly visible and well lit.

CONSISTENCY REQUIREMENT:

This image will serve as the master visual reference for
the same fictional character in future images.

Establish a clear, recognizable face, hairstyle, beard,
skin tone, and overall appearance.

Avoid exaggerated facial features, excessive retouching,
beauty filters, distorted anatomy, and stylized proportions.
Generate several variations if necessary and choose the one with the clearest, most appealing, and most reproducible facial features.
Do not select a reference image just because it looks attractive. Choose one that clearly establishes the character’s identity.
Step 3: Save the Original Reference
Save the chosen image in a dedicated folder.
For example:
HG-Promts/Character-References/Main-Character.png
Keep the original file unchanged. If you want a different outfit or expression, create a separate variation rather than replacing your master reference.
Method 2: Use the Same Reference Image for Every New Scene
Once you have a master image, upload it whenever your image generator supports reference-based generation or editing.
Then describe the new scene while explicitly preserving the character’s appearance.
For example, you could generate:
- The character walking through a modern city.
- The character sitting inside a coffee shop.
- The character standing on a university campus.
- The character working at a laptop.
- The character standing beside a car at sunset.
The key is to keep the reference image and identity description consistent while changing the environment.
Example: City Scene Prompt
Use the uploaded reference image as the primary visual
reference for the same fictional male character.

IDENTITY LOCK:

Preserve the character's recognizable facial identity,
face shape, eye spacing, nose, lips, skin tone, hairstyle,
hairline, beard, mustache, and body proportions.

Do not redesign the character or introduce a different face.

SCENE:

The character is walking along a modern American city street
on a clear afternoon.

He is wearing the same dark-blue denim jacket and plain
white T-shirt shown in the reference image.

POSE AND CAMERA:

Natural walking pose, relaxed shoulders, realistic body
language, three-quarter camera angle, medium shot.

LIGHTING:

Soft afternoon sunlight, natural shadows, realistic
skin texture, cinematic but believable colors.

BACKGROUND:

Modern city buildings, pedestrians in the distance,
and a softly blurred urban background.

IMPORTANT:

Change the environment and pose, not the character's identity.
Keep the result photorealistic and visually consistent
with the reference image.
For the next image, replace only the scene, pose, and any intentional outfit change. Keep the identity instructions unchanged.
This method is more reliable than repeatedly asking a generator to invent the same person from a short description, although exact facial matching is not guaranteed.
Method 3: Use Gemini for Character Consistency
Google’s Gemini image-generation documentation describes character consistency and image editing capabilities in supported versions of its image-generation tools. The exact features available depend on the model, account, and interface. <sup>2</sup>
A practical workflow is:
- Open Gemini and use an image-generation or editing feature available to your account.
- Upload the master character reference image.
- Ask Gemini to preserve the character’s recognizable identity.
- Describe the new scene, pose, clothing, and background.
- Review the output against the master reference.
- If the face changes, request a targeted correction using the reference image again.
For better results, start with a simple scene before attempting complicated poses, crowded environments, or unusual camera angles.
Gemini Character Consistency Prompt
Use the uploaded image as the reference for the same
fictional character.

Create a new image of this character in a different scene.

Preserve the recognizable facial identity, face shape,
eye spacing, nose, lips, hairstyle, hairline, beard,
mustache, skin tone, and body proportions.

Keep the character's signature clothing unchanged unless
I explicitly request an outfit change.

NEW SCENE:
[Describe the new location and environment.]

NEW ACTION:
[Describe what the character is doing.]

CAMERA:
[Describe the shot type and camera angle.]

LIGHTING:
[Describe the lighting and atmosphere.]

Keep the image photorealistic and preserve the character's
recognizable appearance. Change only the requested scene
elements. Do not unnecessarily redesign the face.
The important part is to use the same reference image for each new scene. A prompt cannot compensate completely for an inconsistent or missing reference.
Method 4: Maintain Character Consistency in ChatGPT Images
ChatGPT image generation can also be used to develop and edit a recurring character.
OpenAI’s image-generation guidance recommends using references, stating what must remain fixed, and making small, targeted revisions rather than requesting broad changes to an existing image. <sup>3</sup>
A simple workflow is:
- Generate the master character portrait.
- Keep that image available in the conversation or upload it again when needed.
- Request a new scene using the reference.
- State which features must remain unchanged.
- Review the result and ask for a targeted correction if needed.
For example:
Create a new image using the uploaded character image
as the visual reference.

Keep the same fictional character, recognizable face,
hairstyle, beard, skin tone, and body proportions.

Change only the background to a modern coffee shop.
Show the character sitting at a table with a laptop.

Keep the outfit unchanged.

Use realistic photography, natural window lighting,
and a medium camera shot.

Do not redesign the character or change the facial identity.
If the face looks different, avoid immediately regenerating the entire scene with a completely different prompt. First try a specific correction, such as asking to restore the reference character’s face while preserving the existing composition.
Method 5: Use Character References in Midjourney
Midjourney offers reference-based workflows for bringing a recurring character into new images.
Its documentation distinguishes between reference types and model versions. In Version 7, the Omni Reference feature supports characters and objects; Midjourney’s Version 8 series uses its newer Edit Model workflow. Available options and limitations depend on the version you select. <sup>4</sup>
The general workflow is:
- Upload or select your character reference.
- Attach it using the appropriate reference feature for your model version.
- Describe the new scene in the text prompt.
- Adjust the reference strength or weight where supported.
- Generate variations and compare the face with your master image.
Midjourney’s reference system is not a guarantee of pixel-perfect identity. Intricate details, facial features, and clothing elements may still vary.
Do not copy older --cref instructions blindly into a different model version. Check the documentation for the version you are using.
Method 6: Separate Character Identity from Image Style
One of the most useful techniques is to treat character identity and visual style as two different things.
Character identity answers:
- Who is the character?
- What does the face look like?
- What hairstyle and facial hair does the character have?
- What body proportions and distinctive features must remain stable?
Visual style answers:
- Is the image photorealistic or illustrated?
- Is the lighting soft or dramatic?
- Are the colors warm or cool?
- Does the image resemble a movie still, fashion photograph, or cartoon?
Midjourney and Adobe Firefly provide reference features that can help guide character-related elements, visual style, or image structure, although the exact capabilities differ between tools. <sup>4 5</sup>
If you change the style reference every time, the output may look less consistent. If your goal is a single visual series, keep the style instructions stable as well.
Method 7: Create a Character Reference Sheet
A single portrait is a useful starting point, but a reference sheet can provide additional guidance.
A character reference sheet may include:
- Front-facing portrait
- Three-quarter portrait
- Side profile
- Full-body view
- Neutral expression
- Smiling expression
- Signature outfit
- Close-up of distinctive features
The sheet should show the same character from different angles, rather than presenting several unrelated interpretations of the face.
Character Reference Sheet Prompt
Create a professional character reference sheet for the
same fictional character shown in the uploaded reference.

Include a front-facing portrait, a three-quarter portrait,
a side profile, and a full-body view.

Maintain the same recognizable face, facial proportions,
hairstyle, hairline, skin tone, beard, mustache, and body
build across every view.

Keep the signature outfit identical in all panels.

Use consistent lighting, neutral poses, a plain background,
and a clean reference-sheet layout.

The purpose is to document the character's appearance
for use in future AI-generated illustrations.

Do not create multiple different people.
Inspect the sheet carefully. AI systems can accidentally produce different faces in different panels, even when instructed not to. If that happens, generate or correct each view individually before using it as a reference.
Method 8: Keep a Permanent Character Bible
If you create recurring characters for videos, comics, stories, or social media, maintain a character bible—a document that records all the details that should remain consistent.
For example:
| Character detail | Fixed specification |
|---|---|
| Face | Oval face, defined jawline |
| Eyes | Dark brown |
| Hair | Thick, wavy black hair |
| Facial hair | Short, trimmed beard |
| Skin tone | Medium brown |
| Build | Average athletic |
| Signature outfit | Dark denim jacket, white T-shirt |
| Visual style | Photorealistic cinematic photography |
| Reference image | Master character portrait |
| Flexible elements | Background, pose, camera angle |
When you create a new image, use this information as your starting point.
If the character changes clothes for a particular scene, document that change. This prevents accidental variations from becoming part of the character’s permanent design.
Method 9: Use Small, Targeted Edits Instead of Starting Over
Suppose the character’s face is correct, but the background is wrong. Regenerating the entire image may change details that were already working.
A better approach is to use an editing feature when available and request a specific change.
For example:
Keep the existing character, facial identity, hairstyle,
beard, clothing, pose, and camera composition unchanged.

Change only the background to a modern university campus.

Preserve the original lighting direction and realistic
photographic style.

Do not redesign the face or modify other parts of the image.
OpenAI’s image-generation guidance specifically recommends describing what should change and what should stay fixed, then making small, targeted revisions. <sup>3</sup>
This technique is particularly useful for correcting backgrounds, changing props, adjusting lighting, or making controlled edits to an established scene.
Method 10: Troubleshoot Common Character Consistency Problems
Problem: The Face Looks Different in Every Image
Likely cause: The generator is relying too heavily on text or interpreting a reference loosely.
What to do: Upload the master image again, repeat the key identity details, and simplify the scene. Test the character in a neutral background before adding complicated elements.
Problem: The Character Looks Right, but the Hairstyle Changes
Likely cause: The hairstyle is not described clearly enough, or the prompt explicitly requests a different look.
What to do: Specify the hair length, texture, color, and hairline. If the hairstyle must remain unchanged, say so directly.
Problem: The Face Is Consistent, but the Clothes Change
Likely cause: Clothing has not been established as a fixed feature.
What to do: Include the same outfit in your reusable prompt and reference image. If clothing changes are intentional, describe the new outfit without changing the face.
Problem: The Character Looks Different in Full-Body Images
Likely cause: The face occupies a smaller part of the frame, making facial details harder to preserve.
What to do: Use a clear face reference, explicitly describe the character’s proportions, and test medium shots before moving to full-body compositions.
Problem: The Character Looks Different in Anime and Photorealistic Images
Likely cause: The visual style changes how facial features are represented.
What to do: Keep the character in one visual style if strict consistency is your priority. If you need multiple styles, establish a separate reference workflow for each style.
Problem: The Character Changes When You Add Other People
Likely cause: The generator may blend visual characteristics or interpret the scene ambiguously.
What to do: Identify the main character clearly in the prompt, describe the other people separately, and specify their positions in the scene. When the tool supports multiple reference images, explain what each image represents.
Best Practices for Consistent AI Characters
For the most reliable workflow, follow these principles:
- Start with one master reference. Avoid changing your character’s core design with every new image.
- Keep an identity description. Reuse the same face, hair, facial hair, and body-proportion details.
- Change one or two variables at a time. Begin with simple scenes before attempting complex ones.
- Use reference features when available. Text alone may not preserve every facial detail.
- Keep your visual style consistent. Reuse lighting, color, and photography instructions when continuity matters.
- Review every result. Compare the face, hairline, eyes, beard, and proportions against the original.
- Edit selectively. Correct the part that is wrong instead of changing everything.
- Keep a record of successful prompts. Save the prompts and reference images that produce the most consistent results.
One additional point matters if you’re creating a series with a real person’s likeness: use reference photos only when you have the appropriate permission, and respect the person’s privacy.
Frequently Asked Questions
1. How do I keep the same face in multiple AI images?
Start with a clear master portrait, upload it as a reference whenever supported, and reuse a detailed character description. Keep the face, hairstyle, skin tone, and other defining features fixed while changing the scene.
2. Which AI tool is best for character consistency?
There is no single best tool for every workflow. Gemini and ChatGPT offer reference-based image generation and editing capabilities, while Midjourney has model-specific reference features. Test your intended scenes before choosing a tool for a large project.
3. Can I use the same character in different outfits?
Yes. Keep the master reference and identity description consistent, then explicitly request the new outfit. Results depend on the image generator and the strength of its reference controls.
4. Can I create consistent AI characters without paying?
Potentially. You can test free image-generation options or free usage allowances, where available. Access, generation limits, and reference features vary by provider and can change over time.
5. Why does my AI character’s face keep changing?
The generator may interpret the prompt differently, give insufficient weight to the reference, or struggle with a complex scene. Reuse the master image, simplify the prompt, and make targeted edits.
6. Can I use consistent characters for AI videos?
Yes. A consistent set of reference images can help establish the character before creating video scenes. Video generation adds further challenges because facial appearance, clothing, and body proportions must remain stable across frames.
7. Does a longer prompt always produce better consistency?
No. A longer prompt can introduce conflicting instructions. A clear identity description, a suitable reference image, and a focused scene description are often more useful than adding dozens of repetitive adjectives.
Final Thoughts
Keeping the same character in multiple AI images is less about finding a magic prompt and more about building a reliable process.
Create a clear master portrait, save a reusable character description, use reference-image features whenever possible, and make controlled changes to each new scene. When an image does not match, correct the specific problem rather than starting over unnecessarily.
For creators building AI photo series, illustrated stories, social media content, or recurring video characters, this workflow can make the production process much more consistent and predictable.
The most important rule is simple: keep the character’s identity fixed, and let the scene do the changing.