
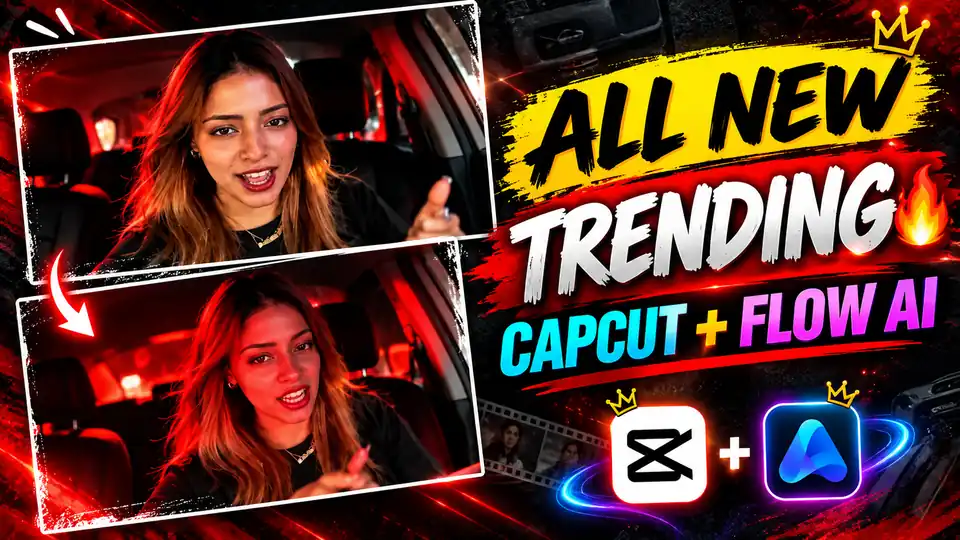
Aapke uploaded reference video ko dekhne par iska overall style clear hai: car ke andar front-facing cinematic shot, dramatic red lighting, fast expressions, hand gestures, head movements aur large bold text overlays. Video roughly 25 seconds ka hai aur iska main attraction subject ki expressive performance + red cinematic color treatment + moving text hai.
Agar aap isi style ka video apni photo/video se banana chahte hain, to sirf CapCut template use karna enough nahi hai. Reference performance ko recreate karna, apni identity maintain karna aur phir CapCut mein timing/text/effects match karna better workflow hai.
Video Ka Overall Look Kaisa Hai?
Reference video mein kuch major elements hain:
- Car interior background
- Front-facing camera angle
- Close/medium-close framing
- Strong red ambient lighting
- Dark cinematic surroundings
- Subject camera ki taraf perform karta hai
- Frequent hand gestures
- Head movement aur playful expressions
- Fast-paced cuts
- Large bold text overlay
- Red/black visual theme
- Text subject ke behind/around appear hota hai
- Approximately 25-second short-form format
Isi combination ki wajah se video normal car selfie ke comparison mein much more cinematic lagta hai.
Step 1: Reference Video Save Karein
Sabse pehle jis CapCut template/style ko recreate karna hai uska reference video ready rakhein.
Aapke case mein reference video ko movement reference ki tarah use karna useful hai.
Aapko observe karna hai:
- Subject kis direction mein head move kar raha hai?
- Hands kab camera ke paas aa rahe hain?
- Expression kab change ho raha hai?
- Camera kitna close hai?
- Text kis moment par appear hota hai?
- Text kitni der screen par rehta hai?
- Scene mein red light kitni strong hai?
- Cuts kis beat par ho rahe hain?
Ye details later editing mein kaafi important hongi.
Step 2: Apni Photo Ready Karein
Agar aap AI ke through reference video jaisa performance create karna chahte hain, to sabse pehle ek clear photo select karein.
Best result ke liye:
- Face clearly visible ho
- Photo high resolution ho
- Face blur na ho
- Heavy beauty filter na laga ho
- Hair clearly visible ho
- Face partially covered na ho
- Lighting reasonably clear ho
Front-facing portrait generally identity reference ke liye easiest hota hai.
Important
Ek photo se automatically perfect body movement generate hoga, aisa assume mat karein.
Photo identity provide karti hai; reference video movement provide karta hai.
Ye distinction is entire workflow ka core hai.
Step 3: AI Se Reference-Style Performance Create Karein
Agar aapke paas apni video nahi hai aur sirf photo hai, to AI video generator ka use kiya ja sakta hai.
AI ko:
Your Photo → Identity
Reference Video → Movement & Performance
ke form mein samjhana chahiye.
Aap ye short prompt use kar sakte hain:
Use my uploaded photo as the exact identity reference. Preserve my real facial identity, facial structure, skin tone, eyes, nose, lips, hairstyle and natural features.

Use the reference video only for performance, body movement, facial expressions, hand gestures, head movements, timing and camera framing. Do not copy the reference person's identity.

Recreate the same front-facing car interior performance with dramatic deep-red ambient lighting, dark cinematic surroundings and natural window light. Maintain direct eye contact, natural lip movement, expressive eyes, playful expressions, subtle smiles and rhythmic head movements.

Recreate the hand gestures and energetic movements naturally. Keep my face consistent and recognizable throughout the entire video.

Preserve realistic skin texture, natural hair movement, realistic hands and fingers, believable motion and subtle camera movement. The final video should look like I personally filmed this performance, not like an AI face swap.
Step 4: Red Lighting Create Karein
Reference video ka sabse noticeable element red lighting hai.
Normal footage ko sirf red filter lagane se same cinematic appearance nahi milega.
CapCut mein aap lighting ko multiple adjustments se build kar sakte hain.
Basic approach:
Adjustments
Try starting around:
- Brightness: slightly lower
- Contrast: moderately higher
- Saturation: slightly higher
- Highlights: lower
- Shadows: slightly lower
- Temperature: slightly warmer
- Sharpen: moderate
Phir red tint/color adjustment add karein.
Lekin yahan ek common mistake avoid karein:
Entire frame ko pure red mat bana dena.
Reference video mein face par red light strong hai, lekin background dark hai.
Isliye objective hai:
Red subject lighting + dark background + visible natural details
Step 5: Car Interior Ko Cinematic Banayein
Agar aapka original video car mein shoot nahi hua hai, to AI generation ke time car environment create karna easier ho sakta hai.
Agar aap already car mein video shoot kar rahe hain, to:
- Dashboard clean rakhein
- Background clutter remove karein
- Camera eye level ke around rakhein
- Subject ko frame ke center mein rakhein
- Interior light ko controlled rakhein
Front camera ko bahut wide-angle par rakhne se face distort ho sakta hai.
Medium-close framing generally more cinematic feel de sakti hai.
Step 6: Performance Ko Reference Ke Saath Match Karein
Reference video ko frame-by-frame dekhkar movements identify karein.
Example:
Opening
Video ke beginning mein hand/camera interaction attention grab karta hai.
Is type ka opening short-form video ke liye important hai because first few seconds viewer retention ke liye critical hote hain.
Middle Section
Subject:
- Camera ki taraf dekhta hai
- Facial expression change karta hai
- Head move karta hai
- Hands camera ke paas laata hai
- Playful performance karta hai
Ending
Last section mein expression aur hand movement ke saath video conclude hota hai.
Aapko AI generation mein exactly same movement reproduce karna zaroori nahi, lekin same performance rhythm maintain karna important hai.
Step 7: CapCut Mein Video Import Karein
Ab CapCut open karein.
New Project → Generated Video Select → Add
Video timeline mein aa jayega.
Agar aap template use kar rahe hain:
Template → Use Template → Photos/Videos Select
Lekin agar aap exact custom version banana chahte hain, to manual editing zyada control degi.
Step 8: Video Ko 9:16 Format Mein Rakhein
Instagram Reels, YouTube Shorts aur TikTok-style videos ke liye:
Aspect Ratio → 9:16
choose karein.
Aapka subject frame ke center area mein properly visible hona chahiye.
Important text ko bilkul bottom par mat rakhein because platform UI usse cover kar sakta hai.
Step 9: Large Text Overlay Add Karein
Reference video ka second major visual element large typography hai.
Text normal small caption nahi hai.
Yahan oversized bold typography use hoti hai jo background mein almost graphic element ki tarah behave karti hai.
CapCut mein:
Text → Add Text
phir bold/heavy font choose karein.
Text ko large size mein rakhein.
Example structure:
CHE
     ...TEXT...
ya aap reference video ke dialogue/lyrics ke according text divide kar sakte hain.
Text Placement
Text ko:
- Center
- Behind subject
- Slightly overlapping
- Full-width
style mein use kiya ja sakta hai.
Step 10: Text Ko Subject Ke Behind Kaise Rakhein?
Ye effect video ko considerably more professional bana sakta hai.
Simple layering:
Layer 1: Background/video
Layer 2: Large text
Layer 3: Subject cutout
Is arrangement se text subject ke peeche दिखाई देगा.
Agar CapCut mein subject cutout available hai:
Remove Background / Auto Cutout
use karke subject ko separate layer par rakh sakte hain.
Then:
Video Background → Text → Subject Cutout
Isse text subject ke behind appear karega.
Step 11: Text Animation Add Karein
Static text reference style ko fully recreate nahi karega.
CapCut mein text animation try karein:
- Slide
- Pop
- Fade
- Zoom
- Tracking
- Motion-based entrance
Lekin animation excessively flashy mat rakhein.
Reference style ka strength typography ka scale + timing hai, not dozens of random effects.
Step 12: Beat Ke Saath Text Change Karein
Agar reference audio mein beat hai, to text ko beat ke according change karein.
Timeline ko zoom karke important beats identify karein.
Then:
Text Clip → Split
karke different words/phrases separately place karein.
Example:
0–3 sec → WORD 1

3–6 sec → WORD 2

6–9 sec → WORD 3

9–13 sec → WORD 4

13–17 sec → WORD 5

17–21 sec → WORD 6

21–25 sec → FINAL WORD
Exact timing aapke audio/reference ke according adjust hogi.
Step 13: Red Text + Black Shadow
Reference style mein high-contrast typography important hai.
Red text ko dark background ke against use karne se strong visual contrast milta hai.
CapCut mein text ke:
- Color
- Stroke
- Shadow
- Opacity
adjust karein.
Agar text face ke upar aa raha hai, opacity slightly reduce karna readability improve kar sakta hai.
Step 14: Camera Movement Add Karein
Agar AI-generated video completely static hai, to subtle keyframe movement add kar sakte hain.
CapCut mein:
Video → Keyframe
Use:
Start
Scale: approximately 100%
Middle
Scale: approximately 103–105%
End
Scale: approximately 100–103%
Isse subtle push-in/pull-out effect create ho sakta hai.
Over-zoom avoid karein.
Step 15: Speed Ramping Carefully Use Karein
Fast-paced reference videos mein kuch moments slightly faster feel ho sakte hain.
CapCut:
Speed → Curve
se speed variations create ki ja sakti hain.
Lekin AI-generated footage mein excessive speed ramping se:
- Face distortion
- Hand artifacts
- Unnatural movement
more noticeable ho sakte hain.
Isliye subtle speed changes better hain.
Step 16: Expressions Ko Preserve Karein
AI video ka sabse important part sirf face similarity nahi hai.
Expression bhi match hona chahiye.
Reference style ke liye:
- Direct eye contact
- Small smile
- Eyebrow movement
- Playful expression
- Head tilt
- Rhythmic head movement
important hain.
AI prompt mein explicitly mention karna useful hai.
Step 17: Hands Ko Carefully Check Karein
Final video export karne se pehle hands ko timeline mein carefully inspect karein.
Especially jab:
- Hand camera ke paas aaye
- Fingers spread hon
- Hand face ke paas ho
- Fast movement ho
tab frame-by-frame check karein.
Agar fingers distorted hain, to better reference generation ya alternate take use karna usually better hai.
Sirf CapCut filter se bad hand anatomy fix nahi hogi.
Step 18: Final Color Grading
Final stage mein overall color balance adjust karein.
Target look:
Dark + Red + Cinematic + High Contrast
Lekin face completely crushed black ya oversaturated red nahi hona chahiye.
Skin detail visible rehni chahiye.
Aapka face video ka primary subject hai, isliye lighting ka focus face par rehna chahiye.
Step 19: Add Audio
Reference video ke audio/dialogue/music ko legally reuse karne ka assumption mat karein.
Agar template platform ke officially available audio system mein use ho raha hai, platform ke available options check karein.
Otherwise:
- Original audio
- Licensed music
- Your own voice
- Platform-approved sound
use karna safer approach hai.
Step 20: Export Settings
Final video ke liye generally:
Resolution: 1080p
Frame Rate: 30 FPS
Format: MP4
Aspect Ratio: 9:16
Agar source genuinely high-quality 60 FPS hai, to 60 FPS consider kar sakte hain.
Lekin AI-generated footage ko unnecessarily 60 FPS mein convert karne se quality magically improve nahi hoti.
Complete Workflow in One Line
Is entire effect ko simple workflow mein dekhein:
Your Photo → AI Identity Video → Reference Movement → Car Scene → Red Lighting → CapCut → Text Behind Subject → Beat Sync → Color Grade → 9:16 Export
Common Mistakes You Should Avoid
1. Sirf Face Swap Karna
Face swap se identity aa sakti hai, lekin performance natural nahi ho sakti.
2. Too Much Red
Pure screen ko red kar dena cinematic lighting nahi hai.
3. Too Many Effects
Har second transition/effect add karne se video cluttered ho jata hai.
4. Tiny Text
Is style ka typography large hona chahiye.
5. Poor Quality Reference Photo
AI identity consistency directly affect ho sakti hai.
6. Excessive Camera Shake
Cinematic ka matlab shaky footage nahi hota.
7. Bad Hand Movement Ignore Karna
AI video mein hands ko final export se pehle check karna mandatory samjhein.
8. Reference Person Ki Identity Copy Karna
Reference video ko movement/style reference rakhein, identity reference nahi.
Best Prompt for Creating This Exact Style
Create a realistic cinematic short video using my uploaded photo as the exact identity reference. Preserve my facial identity, face structure, skin tone, eyes, nose, lips, hairstyle and natural features.

Use the reference video only for movement, performance, timing, framing, expressions and gestures. Do not copy the reference person's identity.

Place me inside a car with an intimate front-facing camera perspective. Use dramatic deep-red ambient lighting, dark cinematic surroundings, realistic shadows and subtle natural light through the windows.

Match the reference-style energetic performance with direct eye contact, natural lip movement, playful expressions, eyebrow movements, head movements and rhythmic hand gestures, including hands moving naturally near the camera.

Keep my identity consistent throughout the entire video. Preserve realistic skin texture, natural hair movement, realistic hands and fingers and physically believable motion.

Add subtle cinematic camera movement and maintain the same fast-paced expressive energy. Avoid face morphing, identity drift, distorted hands, extra fingers, artificial skin, unnatural expressions or robotic motion.

The final video should look like I personally recorded this cinematic car performance, not like an obvious AI face swap.
Final Result
Aapke reference video ka real formula sirf CapCut template nahi hai.
Actually look ko 5 elements create kar rahe hain:
1. Car selfie composition
2. Strong red lighting
3. Expressive performance
4. Oversized typography
5. Fast timing + cinematic color grading
Agar aap in five elements ko properly reproduce karte hain, to same visual style ka video banaya ja sakta hai—even if aapka original footage/reference setup different ho.
2ook